Saturday, November 19, 2011

How To: Make Your Own Font

For those of you who have ever wanted to create your own font, here is how to. 

 I used a program called "High-Logic Font Creator", seems complicated, but it's quite easy to use actually.

First, download the program. Link here (8mb)

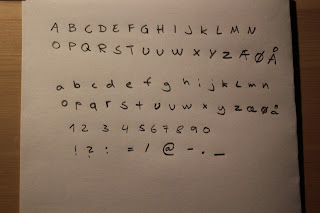
I decided to use my handwriting, so first i wrote down all the letters I wanted to use on a piece of paper.


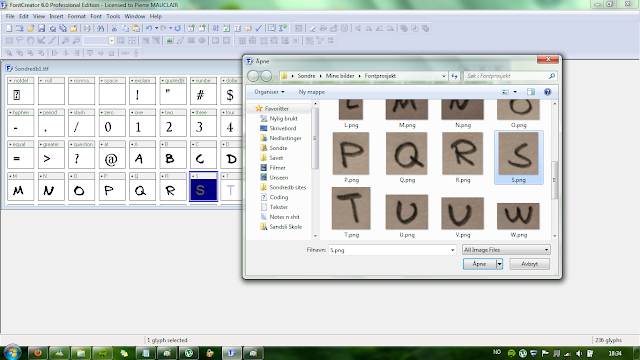
 Then I seperated each letter as a picture file. I used paint. This can take some time, but you'll get a rythm and will do it fast enough. 


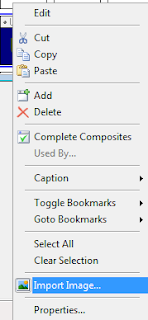
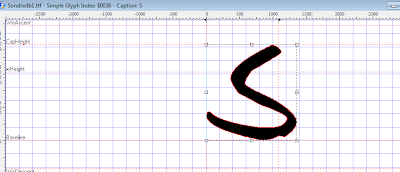
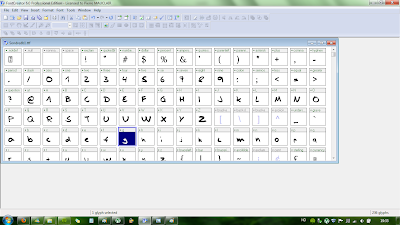
 Now I used the program to add each letter to the correct picture.
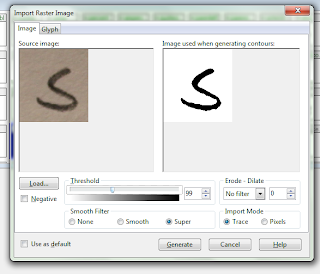
I used the program to genereate a version of the letter.


The next step was to then set the correct margins for each letter. You must adjust the height (for captial or small), and width.
 

When you're done, you must save it as a font. It will create a .tff file. 


Now, you must add this file to your font directory. You can locate it from the Control-Panel. 

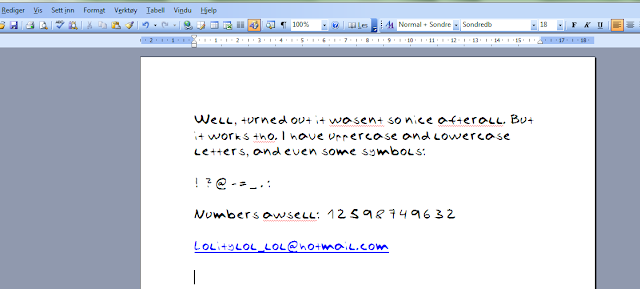
This is the result:

 The result was bad, maybe its my handwriting. There you have it. Enjoy your own person font!

Sunday, August 7, 2011

How To: Patch Windows Live Messenger - Remove ads, nudge delay and more

Many people use Windows Live Messenger today. Chatting, and keeping track of the mail is useful, but lately there has been added new changes to it, including advertisments and limitations. There is however possible to remove/change this with an simple Patch.

There is a applications called A-Patch that allows you to modify, remove and change certain things about Windows Live Messenger. It's small of size, and very easy to use with good instructions.


Download A-Patch 


Open the application, and follow the instructions. Choose whatever you want to change, and patch. The program has a restore-function if you want to undo any changes.


Here is a step-by-step video showing this:
 

Thursday, July 28, 2011

How To: Make a Homemade USB Mobile Phone (Nokia) Charger

You may find it useful to charge your phone at the go, and it can be bothersome to bring a charger with you at alle times. There is however very easy to bring a simple, small USB-charger. They can be bought for a buck at eBay, but it is also very easy to make one yourself!

I made a Nokia charger since i use that phone brand. It can be done with other brands too.

The first thing you should check, before attempting to build this, is the Voltage and Amperage that your phone charges at. You can read it on the wall-charger. My nokia charger sended 5V DC, and 350ma, but I found out that there were Nokia chargers that gave up to 800ma. Since the USB-port provides a
Voltage of 5V, DC and an Amperage of max 500ma, this suited my phone.


Now, to make the USB-charger You will need:

- a USB cable with a male end
- a wall charger (you will only need the tip or "head" that connects to the phone)


 I got my USB-cable from an old webcamera that was broken, and I cut of the USB-cable from it. I stripped out the 4 wires, and cleared out the red and black, which carries the power.


The charger head i got from a spare Nokia charger i had lying around. I cut of the cable, seperated and cleared the two wires inside.


The next thing I did was to clear the wires apart from eachother, and then I connected, (or twisted) the red wire from the USB-cable, to the red wire on the head-cable, and did the same with the black ones.   

NOTE: MAKE SURE THAT THESE TWO WIRES, (Red-Red) and (Black-Black) REMAIN SEPERATE AND PREVENT THEM FROM TOUCHING EACHOTHER, AS THIS CAN LEAD TO A SHORT CURCUIT.


In order to prevent the wires from touching eachother, I seperated the red and black wire with electrical-tape, and then I sealed it all up with some more tape.
I connected it to the PC, and my phone started charging.


I made my cable very long, but you don't have to. Choose a lenght that suites you. 

Enjoy!