Whenever you have downloaded a movie, or a TV-series episode, it usually dont come along with subtitles. This can be a little bit annoying for some, but there is a very easy way to add subtitles.
1. The first thing you need is a plugin for Windows that allows you to actually play the subtitles you get with your video. Its called
Vobsub, its 100% free, small and you can
Download it Here
2. After you got Vobsub installed, locate the uploader of the videofile you want the subtitle for. When you have downloaded a movie, or an episode, the uploader usually has a nickname. Fint that nickname. Its placed after the Title, year, and format.
3. This is why you need the nickname. Many different uploaders can have added the same movie, and they are different in lenght. The subtitle must match the correct uploader, or else it wont be syncronized. So now that you got your nickname, its time to find the subtitles for it. There are many webpages that you can locate subtitles on. I would recommend using
Subscene.com
Search for your movie, and then find the correct uploader version, in your language. (
Note that there are mostly english and arbabian subtitles, so you can expect to find your preferred language all the time.)
4. Now that you downloaded your subtitles, (
.srt, .sub or any filetype like that), its time to play it along with your video. In order to do that, you must take the subtitle file you downloaded, and put it
in the same folder as the video file. Then rename the files, to that they both have the same name, and then open the video file in any mediaplayer.
Enjoy!
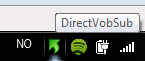
The Vobsub icon will appear on the taskbar when its active. If it don't appear, you have done something wrong.
 I also got an youtube video explaing this.
Watch it Here
I also got an youtube video explaing this.
Watch it Here


